What is overmolding in manufacturing? Learn its materials, process, design limits, cost drivers, and uses for reliable production-ready parts at scale

A rigid plastic housing that needs
a non-slip grip, a connector that must resist moisture, or a handheld device
that cannot rattle apart all present the same production question: how can
multiple functions be built into one dependable component? What is overmolding
in manufacturing? It is an injection molding process in which one material
is molded over or around a previously formed part, creating a bonded,
multi-material component.
For product teams, overmolding
is not simply a cosmetic finish. It can reduce assembly operations, improve
ergonomics, protect sensitive areas, and create a more durable product
architecture. It also introduces material, tooling, and process requirements
that should be addressed during DFM rather than after tooling is released.
What Is Overmolding in
Manufacturing?
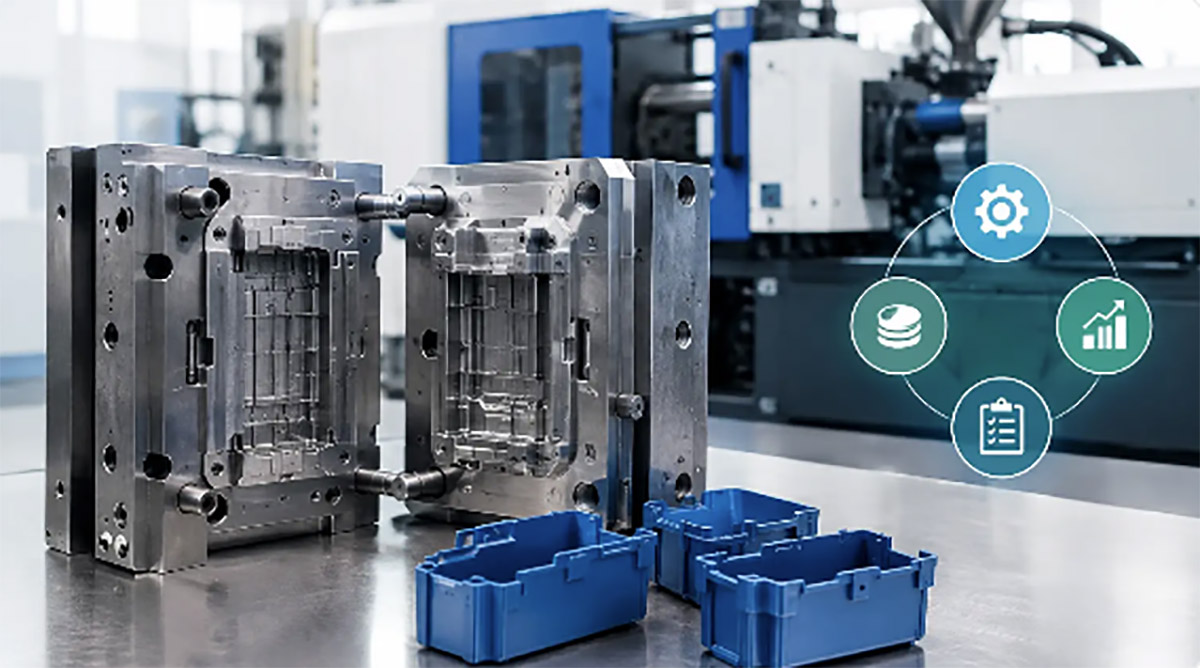
Overmolding combines a substrate with an overmold
material. The substrate is the first component, often a rigid thermoplastic,
metal insert, cable, or another pre-molded part. The overmold is injected onto
selected areas of that substrate in a second molding operation.
A common example is a
glass-filled nylon tool body covered with thermoplastic elastomer, or TPE, at
the handle area. The nylon provides structural strength and dimensional
stability. The TPE adds grip, cushioning, and surface texture. The resulting
part performs functions that would otherwise require separate components,
adhesive bonding, or mechanical assembly.
Overmolding differs from
standard single-shot injection molding because the mold and process must
control the relationship between two materials. The objective may be chemical
bonding, mechanical retention, or a combination of both. The right approach
depends on material compatibility, product use conditions, geometry, and cost
targets.
How the Overmolding Process Works
The process starts with a
substrate part. It may be injection molded in the same facility, produced
by CNC machining, die casting, stamping, or
supplied as a purchased component. The substrate is then loaded into an
overmold tool manually, by fixture, or through automation.
Once the mold closes, molten
overmold material is injected into cavities around the designated substrate
features. Cooling solidifies the material, and the completed part is ejected.
In higher-volume programs, tooling may use rotating platens, robotic handling,
or multi-shot injection molding to improve cycle time and placement
consistency.
The basic sequence is
straightforward, but production success depends on control at each stage:
·
The substrate must be clean and consistently positioned in the tool.
·
Mold temperature, melt temperature, injection pressure, and cooling time
must support repeatable filling and bond performance.
·
Gates and vents must be positioned to prevent trapped air, weld lines,
short shots, or cosmetic defects.
·
The completed part must be inspected for adhesion, flash, dimensional
variation, and surface quality.
For programs that require a
soft-touch material over a rigid plastic, the substrate is usually molded first
and then transferred to the second tool. For metal inserts or electronic
components, the part may be placed directly into the mold before the overmolding
cycle. This is often called insert overmolding.
Common Materials and Compatibility
Requirements
Material selection is the central engineering decision
in an overmolding project. Not every plastic or elastomer will bond effectively
to every substrate. A weak material pairing can look acceptable when parts
leave the mold but fail later under heat, flexing, chemicals, or repeated use.
Common substrate materials
include ABS, polycarbonate, PC/ABS, nylon, polypropylene, PBT, and glass-filled
engineering plastics. Metal substrates such as aluminum, stainless steel,
brass, and stamped steel are also used when stiffness, electrical conductivity,
or wear resistance is required.
Typical overmold materials
include TPE, TPU, silicone, PVC, and specialized thermoplastic vulcanizates.
TPE is frequently selected for grips, buttons, seals, and consumer product
housings because it is process-efficient and available in a broad range of
hardness levels. TPU can offer stronger abrasion and oil resistance. Silicone
is useful where temperature resistance, flexibility, or long-term environmental
performance matters, but its processing and bonding requirements differ from
thermoplastic overmolding.
Chemical compatibility can
create a direct bond between materials, but it should be verified through
supplier data and production trials. Mechanical retention is often added even
when chemical bonding is expected. Features such as undercuts, holes, grooves,
ribs, and through-holes allow the overmold material to lock physically into the
substrate. This gives the design more tolerance against bond variation and
field stresses.
Where Overmolding Adds
Manufacturing Value
Overmolding is widely used because it combines
functional improvements with assembly reduction. In consumer electronics, it
can protect cable exits, form waterproof seals, and add soft contact surfaces.
In industrial products, it can improve grip and impact resistance on tools,
controls, and enclosures. Medical and laboratory devices may use it for tactile
surfaces, sealing areas, or controlled interfaces, subject to appropriate
material and regulatory requirements.
The process is also useful for
cable assemblies and electrical connectors. A molded jacket around a wire
termination can provide strain relief, insulation, and environmental protection
in a single operation. Compared with separate boots, heat-shrink tubing, or
adhesive sealing, a properly designed overmold can produce a cleaner and more
repeatable assembly.
For OEM products, the
commercial advantage often comes from removing secondary operations. A part
that previously required a rigid shell, a rubber grip, adhesive application,
and manual assembly may become one integrated molded component. That can reduce
handling, simplify supplier coordination, and lower opportunities for assembly
error. It does not mean overmolding is automatically the lowest-cost option,
especially at low volumes, but it can improve total production efficiency as
volumes increase.
Design Factors That Affect Cost and
Quality
The best time to evaluate overmolding is before
finalizing part geometry and tooling. A design that looks simple on a rendering
can be difficult to gate, vent, fixture, or eject once both materials are
considered.
Wall thickness needs careful
management. Large thickness transitions in the overmold can cause sink marks,
uneven cooling, or flow hesitation. Very thin sections may not fill
consistently, particularly with soft materials or long flow paths. Draft angles
are equally important. The overmold tool must release the finished part without
tearing soft material or pulling the substrate out of position.
Substrate tolerances directly
affect the second molding stage. If a CNC-machined metal insert varies too
much, it may not seat correctly in the mold fixture. If a plastic substrate
warps after the first shot, the overmold can shift, flash, or expose uneven
edges. Tolerance planning should account for the substrate process, thermal
movement during molding, and the inspection method used at production scale.
Cosmetic requirements also
need to be specific. A soft-touch black TPE can show gate blush, flow lines,
gloss variation, and handling marks differently than a rigid textured plastic.
If the overmold boundary is highly visible, the tool should be designed to
create a controlled shutoff line rather than relying on a broad edge that may
flash.
Tooling Options: Two-Shot Molding
vs. Insert Overmolding
Two-shot molding and insert overmolding can both
produce multi-material parts, but they fit different production needs. In
two-shot molding, the first material and second material are molded in sequence
within a dedicated multi-shot tool and machine setup. The substrate is
transferred automatically between molding positions, often by rotating platen
or core-back action.
Two-shot molding is efficient
for high-volume parts with stable design geometry and a predictable material
combination. Its trade-off is higher tooling complexity and capital cost.
Design changes after tool construction can also be more expensive.
Insert overmolding uses a
separately produced substrate that is placed into an overmold tool. It is often
more flexible for low- to medium-volume production, metal inserts, electronics,
cable assemblies, or projects where the substrate is manufactured using another
process. Manual loading may be practical for pilot runs, while automation can
be introduced when volume and cycle-time requirements justify it.
The appropriate option depends
on annual volume, labor cost, part geometry, change risk, and quality
requirements. A manufacturing review should compare the total cost of tooling,
molding, substrate production, handling, assembly, and inspection rather than
evaluating piece price alone.
Quality Validation Before Mass
Production
A production-ready overmold program should include more
than a visual approval sample. Bond performance may need peel testing, pull
testing, torsion testing, or repeated flex testing depending on the
application. Environmental validation can include thermal cycling, humidity
exposure, chemical contact, UV exposure, and abrasion testing.
Dimensional inspection should confirm critical
interfaces after the overmolding process, not only on the substrate before it
enters the second tool. For sealing components, functional leak testing may be
more meaningful than appearance alone. For electrical assemblies, continuity
and insulation testing may be required after molding to confirm that pressure
and heat have not damaged the internal connection.
Early prototypes are useful
for validating ergonomics and basic geometry, but they may not accurately
predict molding behavior. A DFM review followed by tool trials
is the point where gate location, material flow, bonding, shrinkage, and
fixture design can be confirmed under real process conditions.
Overmolding works best when it
is treated as a product architecture decision, not a last-minute surface
treatment. Define the function of each material, build mechanical retention
where appropriate, and validate the part under the conditions it will actually
face. That approach gives engineering and procurement teams a clearer path from
prototype intent to repeatable production.